If you’ve noticed your MacBook Air running slower than usual, clearing the cache can be a quick and effective solution. Cache files are temporary data stored by your system and applications to speed up processes. However, over time, these files can accumulate and cause your MacBook Air to slow down. In this guide, we'll explore how to clear cache on your MacBook Air to enhance its performance and free up storage space.
Understanding Cache
What is Cache?
Cache consists of temporary files created by your system and applications to improve efficiency. These files include images, scripts, and other data that allow apps and websites to load faster.
Types of Cache
There are three main types of cache on a MacBook Air:
- System Cache: Created by the macOS to speed up system processes.
- User Cache: Generated by user applications.
- Browser Cache: Stored by web browsers to speed up page loading times.
Why Clearing Cache is Important
Improves Performance
Over time, cache files can become corrupted or outdated, leading to slower performance. Clearing the cache can help speed up your MacBook Air.
Frees Up Storage
Cache files can take up significant space on your hard drive. Removing these files can free up storage for more important data.
Fixes Application Issues
Sometimes, applications may not function correctly due to corrupted cache files. Clearing the cache can resolve these issues.
More Read Information- "How To Clear Cache On Macbook Air"
How to Clear System Cache
Step 1: Open Finder
Begin by opening Finder from your Dock.
Step 2: Access the Library Folder
Press Shift + Command + G to open the "Go to Folder" dialog. Type ~/Library/Caches and press Enter. This will take you to the Caches folder within your Library.
Step 3: Delete Cache Files
Select the folders and files within the Caches directory and move them to the Trash. Be cautious not to delete the entire Caches folder itself—just its contents.
Step 4: Empty the Trash
Right-click the Trash icon in your Dock and select "Empty Trash" to permanently delete the cache files.
How to Clear User Cache
Step 1: Open Finder
Launch Finder from your Dock.
Step 2: Go to the User Cache Folder
Press Shift + Command + G to open the "Go to Folder" dialog. Enter ~/Library/Caches and hit Enter.
Step 3: Identify Application Caches
Browse through the folders to find caches related to specific applications. Common culprits include browsers, email clients, and other frequently used apps.
Step 4: Delete Cache Files
Select the cache files and folders for the applications you wish to clean and move them to the Trash.
Step 5: Empty the Trash
Right-click the Trash icon and choose "Empty Trash" to remove the cache files permanently.
How to Clear Browser Cache
Clearing Safari Cache
Step 1: Open Safari
Launch Safari from your Dock or Applications folder.
tep 2: Access Preferences
Click on "Safari" in the menu bar and select "Preferences."
Step 3: Go to the Advanced Tab
In the Preferences window, click on the "Advanced" tab. Check the box next to "Show Develop menu in menu bar."
Step 4: Clear Cache
Now, click on "Develop" in the menu bar and select "Empty Caches."
Clearing Chrome Cache
Step 1: Open Chrome
Launch Google Chrome from your Dock or Applications folder.
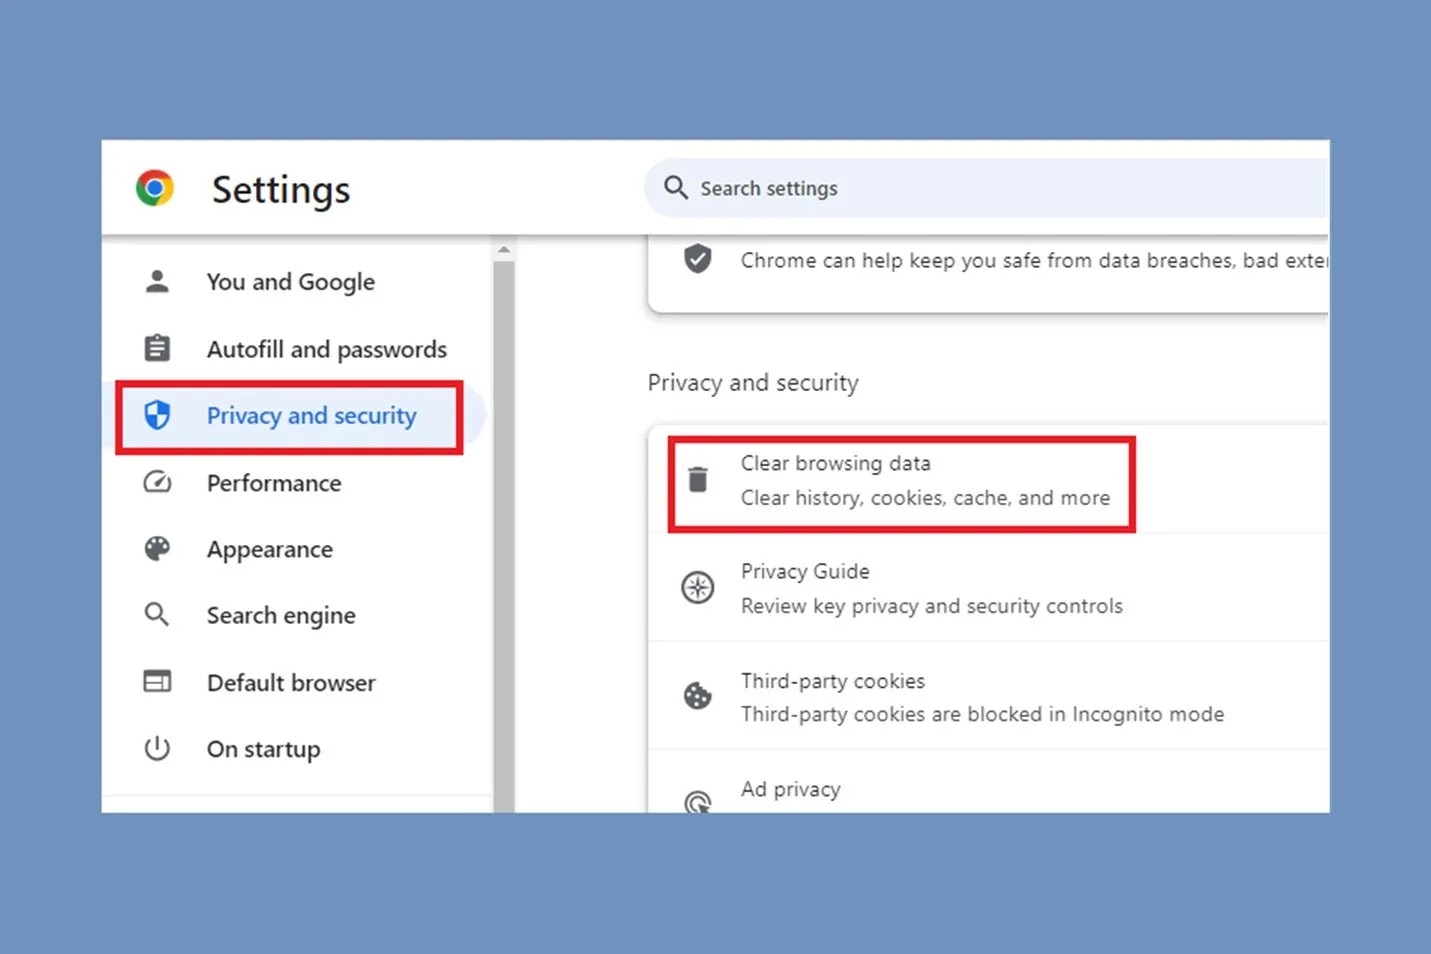
Step 2: Access Clear Browsing Data
Click on the three dots in the upper-right corner, hover over "More tools," and select "Clear browsing data."
Step 3: Choose Time Range
Select the time range for which you want to clear the cache. For a thorough clean, choose "All time."
Step 4: Clear Cache
Ensure that "Cached images and files" is checked, then click "Clear data."
Clearing Firefox Cache
Step 1: Open Firefox
Launch Firefox from your Dock or Applications folder.
Step 2: Access Options
Click on the three horizontal lines in the upper-right corner and select "Options."
Step 3: Go to Privacy & Security
In the left-hand menu, click on "Privacy & Security."
Step 4: Clear Data
Under the "Cookies and Site Data" section, click "Clear Data." Ensure that "Cached Web Content" is checked, then click "Clear."
Using Third-Party Applications
CleanMyMac X
Step 1: Download and Install
Download and install CleanMyMac X from the MacPaw website.
Step 2: Launch CleanMyMac X
Open the application and click on "Smart Scan."
Step 3: Run Scan
Click "Scan" to begin scanning your system for junk files, including cache.
Step 4: Review and Clean
Once the scan is complete, review the results and click "Clean" to remove the cache files.
CCleaner for Mac

Step 1: Download and Install
Download CCleaner for Mac from the Piriform website.
Step 2: Launch CCleaner
Open the application and select "Analyze."
Step 3: Run Analysis
Click "Analyze" to scan for cache files and other junk.
Step 4: Clean Up
After the analysis, click "Run Cleaner" to remove the identified cache files.
Regular Maintenance Tips
Schedule Regular Clean-Ups
Set a reminder to clear your cache regularly, such as once a month, to keep your MacBook Air running smoothly.
Use Storage Management Tools
macOS provides built-in tools to help manage storage. Go to "About This Mac" > "Storage" > "Manage" to access recommendations for optimizing your storage.
Monitor Application Performance
Keep an eye on how applications are performing. If you notice any slowdowns, clearing the cache may help resolve the issue.
Conclusion
Clearing the cache on your MacBook Air is a simple yet effective way to improve its performance and free up storage space. By regularly cleaning your system, user, and browser caches, you can ensure your MacBook Air runs smoothly and efficiently. Whether you use built-in methods or third-party applications, maintaining a clean system is crucial for optimal performance.
More Read-
If you are looking for MacPaw CleanMyPC Account Login, than you can go through with the link.
24x7 MacPaw CleanMyPC Support available